ADMINO+ is a WEB service software, so it cannot communicate directly with your printer.
Unlike WEBMINO, the server configuration is not accessible to users and they cannot install printer drivers and connect their printer directly to the server.
Since 2023 there is a new method for printing Sales Receipts and Invoices (ONLY) on a tape printer without the use of this method. By using the POS-txt printer instead, the system will pop up a windows with the tape invoice or receipt and right-clicking and selecting print in that windows will allow you to send the output to the proper tape printer.
This is why prints are made in PDF and are presented in a window to be printed or saved on your computer. This poses a special problem for certain types of prints.
A receipt printer or a printer dedicated to barcodes are printers that cannot receive PDF files. The commands must be transmitted to them directly.
This is terminal printing (also called DOS type printing).
Terminal printing in ADMINO+ is done in two parts, the server registers the print command when a user requests a print of this type for a valid document type.
A small client software (program installed on your workstation) checks your account for on demand print orders.
If a print order is pending, it retrieves the print job and starts printing locally on the configured printer.
(This print client is only available for Windows at the moment)
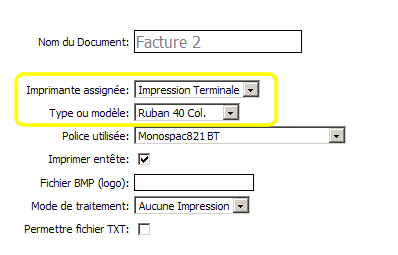

Terminal printing can serve two tasks in ADMINO+. Either sales invoices for the 40-column format (above), or barcode labels for products in inventory (below).
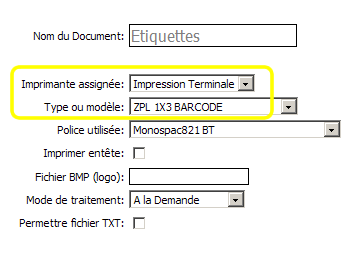
To enable terminal printing, you must:
1) Configure the DOCUMENTS section in the ADMINISTRATIVE SETTINGS for the document(s) in question. In the case of invoices, only the 40-COLUMN RIBBON format is available. For labels, the barcode formats of IPL, ZPL or EPL compatible printers are currently available.
When the form generator is available, it will be possible to configure barcode labels for other languages.
2) FOR ADMINOPLUS Download and install the terminal printing manager on your computer by clicking on this link.
FOR WEBMINO Download and install the terminal printing manager on your computer by clicking on this link.
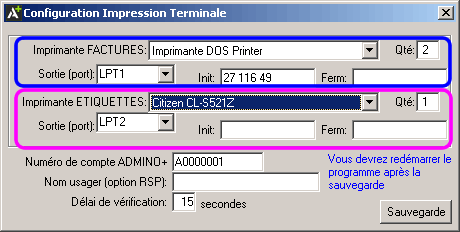
3) Start and configure this program on your computer.
|
Use the INVOICE printer for cash register ribbons and the LABEL printer for barcodes. Only configure the printer of your choice (invoice or label) if necessary.
Indicate the output to which the printer is connected. For a USB printer or a network printer, use the WPO (Windows printer object) output.
The INIT (initialization) and FERM (closure) codes are used to send codes to the printer before and after the print job. For example, the code 27 116 49 allows accents on an EPSON TM series printer or the code 27 54 does the same thing for IBM PROPRINTER compatible printers.
You can also adjust the quantity for each document from 1 to 99.
|
Enter your ADMINO+ account number. Do not enter a user because the manager retrieves the information according to the user connected to this workstation. The RSP option (remote station printing) allows you to configure the client for printing on a workstation where no one is working. The print orders will come from the registered user who will be working on another workstation.
Printing is done strictly on demand (IE you have to press the button).
After saving the configuration, the manager will close and the application will have to be started again to see the new settings.
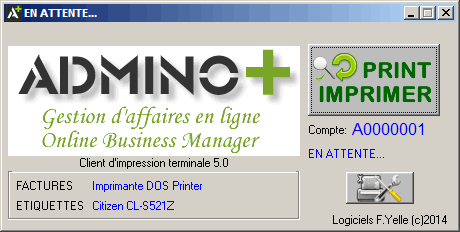
|
When starting the manager you will notice in the title of the window, the message WAITING will be displayed.
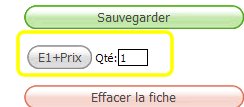
To trigger a print, simply click on the button 
The print job will be executed and the manager will then return to waiting mode.
|
|
|