There are a variety of techniques for preparing and delivering your sales. If your customer's purchases are not picked up immediately, this section may be of interest to you.
The software has several tools to make these tasks easier.
I will give examples for 3 main methods but a variety of variations on these methods can apply to your business.
METHOD 1: The sale takes place but the customer must wait for the preparation of their order before picking it up.

Once the invoice is created, the OPEN INVOICE TRACKING allows the handler to prepare the order.
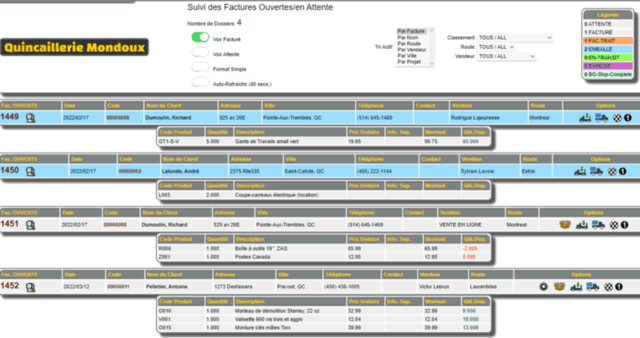
The simple mode is better suited to small screens or tablets but has the same options.
The icons in the last column allow you to either:
- return packed 
- load in the truck and place in transit 
- return shipped 
- finished delivered to the customer  (makes the invoice disappear from the follow-ups) (makes the invoice disappear from the follow-ups)
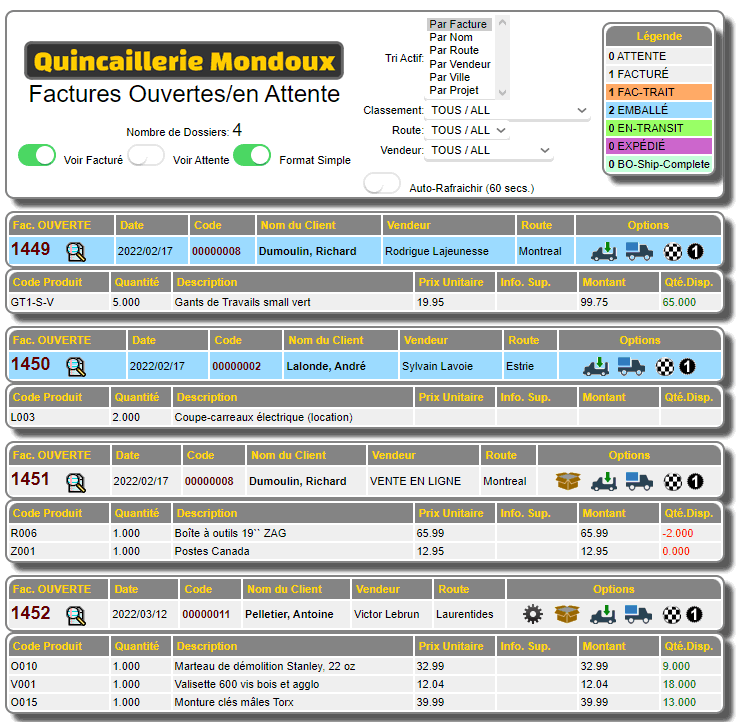 
Another person on another workstation who observes the console and activates AUTO-REFRESH will see the progress of the order in real time and will be able to give it to the customer once it is packed.
He will be able to click and make the invoice disappear from the tracking.
METHOD 2: The sale takes place but the customer's order must be shipped within the day or in the following days.

The same OPEN INVOICE TRACKING can be used but another more complete tool allows the handler to prepare the order and the documents necessary for its shipment.
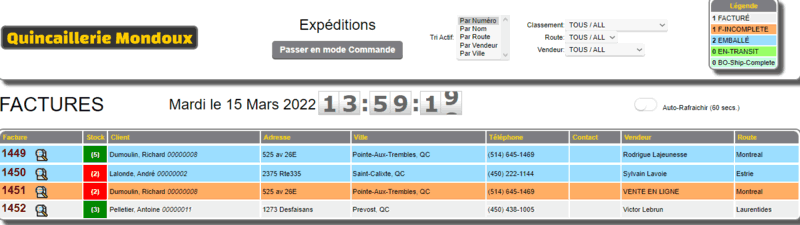
The SHIPPING CONSOLE allows you to view orders or invoices and prepare the required printed documents or labels. There are other more specialized options such as item scanning and lot/serial number selection. See the SHIPPING CONSOLE section for details.
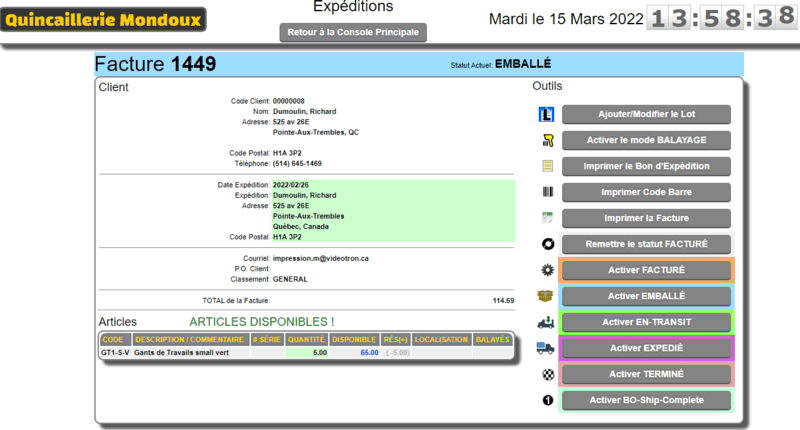
In this console, the items, their availability and location are visible. There are even tools to downgrade an order if a mode is activated by mistake.
METHOD 3: The sale takes place but the delivery by us of the customer's order must be done within the day or in the following days.

The same steps as the method 2 are followed except that this order will be shipped by us. So once packed and ready, the delivery of the order will be done with WEBMINO TRANSPORT SYSTEM.
Check this section because it contains a lot of functions and a help section for each one.
Without dwelling on explaining the concept of routes (you can check the transport section for details), the transport planning allows you to assign this order to a truck on a given date.
We can configure the route schedule for each truck with the TRUCK SCHEDULES.
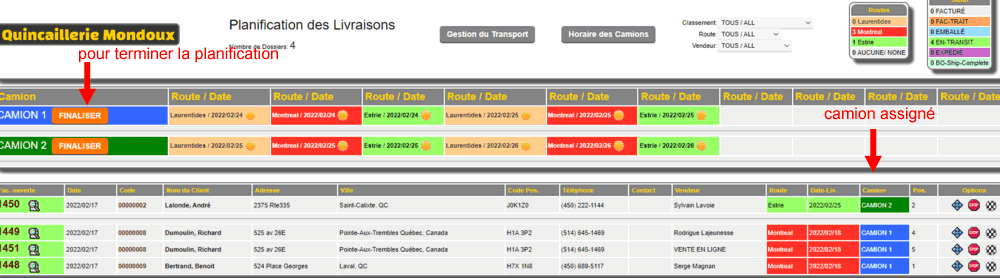
In the transport planning we see two things:
At the top we see the trucks and the routes/dates Max. the next 10.
In the bottom table we see the invoices and their assignment.
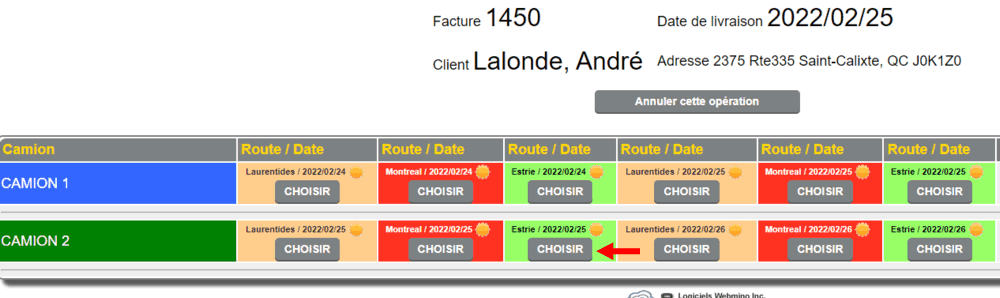
To assign an invoice, simply choose the assignment tool (either the small truck) or (either the 4 arrows) to select the truck/date.
Choose the desired day for the truck that will make the delivery.
Once the invoices are placed in the trucks, we can finalize the positioning of the deliveries on the road.
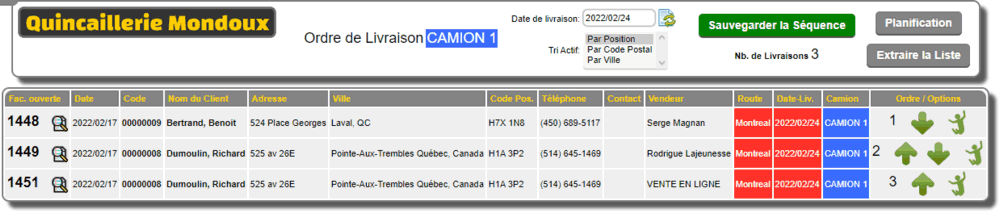
Once the invoices are placed in the trucks, we can finalize the positioning of the deliveries on the road. We use the arrows or the "jump" movement to place the deliveries in sequence. Once finished, we save the sequence and it's over for this "run".
You can also extract a CSV list of the "run" to integrate it into google maps if you have a Google account and a mobile device in the truck allowing you to route the delivery.
The delivery console allows the driver to follow the route in the order prepared on a mobile device on board.
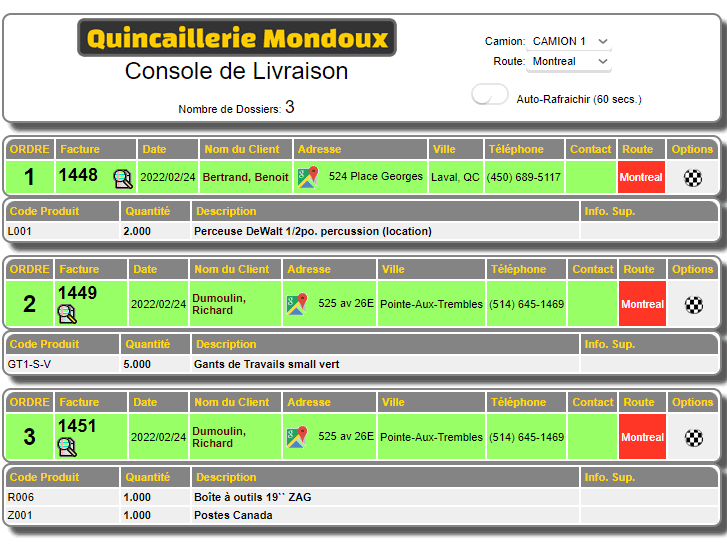
The driver has some tools like the google link (to find the address) and the checkered button when the delivery is finished to remove it from the board.
When the board is empty, the deliveries are finished.
|
|